Line and Rigging
Double Soft Shackle
By Allen Edwards
This double ended soft shackle is the 4th generation of a design that can attach to a pair of eye spliced jib sheets to the clew of a sail very quickly. It is also the 5th version of this generation as improvements were made to make the shackle stronger. In use, the shackle is secure around the jib sheet prior to being "clipped" to the clew. This version is easy to make and has the advantage of a non-constricting hold on the jib sheets. There are links to the previous versions at the bottom of this page
The Shackle
Overview
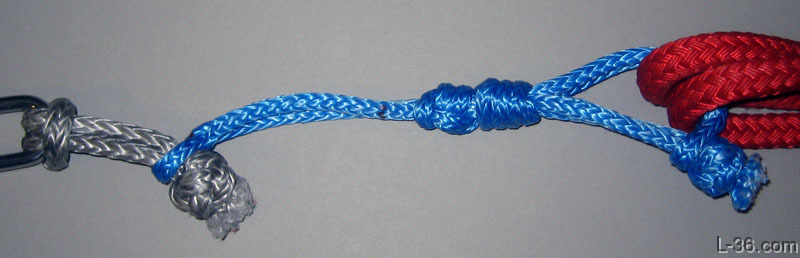
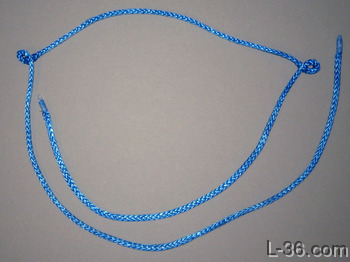
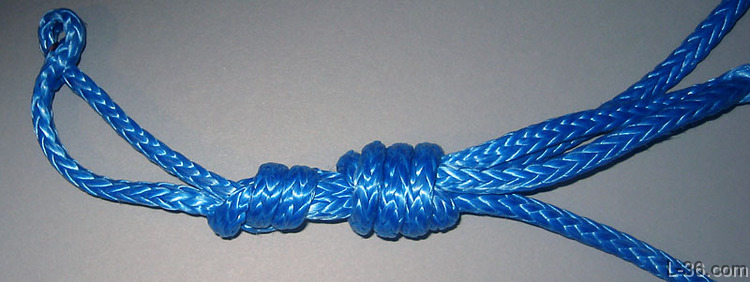
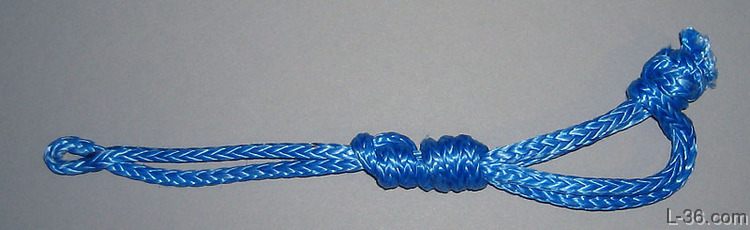
The shackle has two sections. The short section will attach to the Stopper Knot. That needs to be long enough to allow the shackle to open enough to pass the stopper knot thought the loop. I used 4 inches. The shackle is held together with four knots. On the end forming the stopper for one of the shackles is a diamond knot. The other end attaches to a separate stopper loop which also has a diamond knot. The center of the double shackle has what is basically a double bowline and tripple strangle hitch. I started with simpler knots, straight bowline and single strangle hitch and kept increasing the complexity to eliminate failure modes.Testing
I tested this shackle with 7/64 Amsteel using a 5/32 stopper knot. The shackle more or less exploded on failure with breaks at the eye, the bowline, and the strangle hitch. This design went through many iterations, each stronger than the one before. Note that while the force on my 30:1 power winch was considerable, nearly as much as I could manage, it is only roughtly calibrated and the force was less than the line breaking strength as I had a test section of straight line and it did not break.My estimate of the the force is based on measuring the stretch of the 7/16 XLS line that I use around the winch. The stretch was 3/4 inch in one foot in my last measurement before the shackle broke. A 53 pound weight hung on the handle at right angle to the nandle will stretch the line 5/8 inch. Working the math on this would indicate that the shackle broke at 1,900 pounds, which exceeds the rated breaking strength of 7/64 Amsteel. However the test section did not break so it is not as strong as the line, but it is strong.
I used a larger stopper knot as otherwise the stopper knot breaks before the shackle.
To view the carnage from all the testing click HERE. CAUTION: Be sure to do your own testing before using these. Safety is your responsibility not mine.
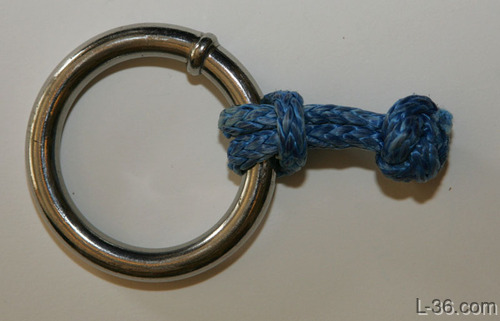
Stopper Loop
Note: For maximum strength of the double soft shackle, use the next size up line for the stopper knot.Using the calculator from the Soft Shackle Howto, measure off a piece twice the length of the first mark. Double the line over, tape it at the fold, and tie a diamond knot using the two ends. Lock it by placing the ends in a vice and pulling on the loop with a lever of some kind. I use a hammer with the had as the fulcrum and the loop on the handle near the head.
How to Make The Double Shackle
These instructions are for 3/16 Amsteel. The shackle uses 56 inches of line. For other sizes, just scale these numbers by the ratio of the line size. For example, for 5/32 Amsteel, multiply all these numbers by .833 so instead of 56 inches use 47 inches.- For this shackle, I wanted 4 inch loops on the shackle for an overall shackle length of about 9 1/2 inches. This allows the loop to be opened enough to go around the diamond knot.
- Measure off 56 inches of 3/16 Amsteel. Mark 1/2 way along the line (at 28 inches from each end).
- Mark spots 9 1/2 inches and 3 inches from the center in opposite directions. Pass the ends through the spots as shown below. For the following instructions, keep the line oriented as it is shown below with the longer tail leading from the left eye going off to the right. This tail will have the triple strangle hitch, which uses much more line than the double bowline.
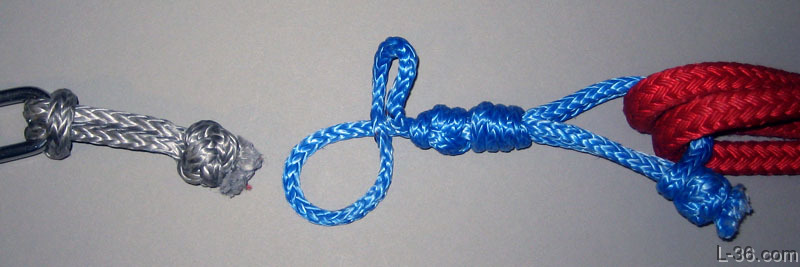
- Using the line between the two eyes, form two loops as shown and pass both tails through these eyes, one from the left, one from the right. These two eyes form the rabbit hole.
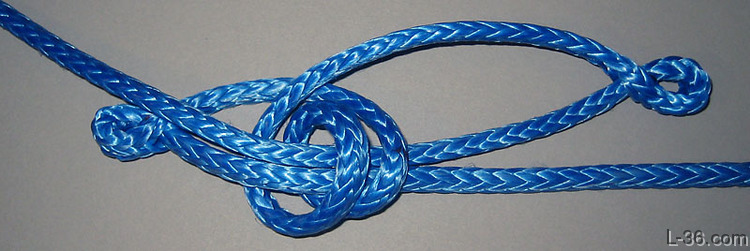
- Taking the tail that is now going off the page to the left, pass it under the eye and back through the rabbit hole.
- Adjust the position of the loops until you can tighten the knot up and have 4 inches from the end of the loop to the tip of the left eye.
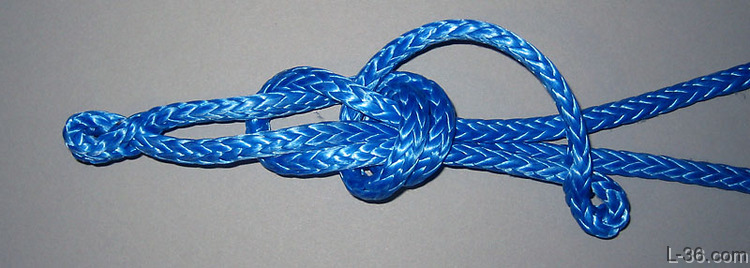
- Now, using the tail that goes off to the right, make a tripple strangle hitch running counter clockwise as you look at it from the left. In other words, bring it toward you on the top of the shackle and away from you on the bottom. It takes four turns around the shackle to form the tripple strangle hitch. The loops start at the right and go backward over the line toward the left, then the end passes under all the loops. Note that I pulled out a bit of the line through the double bowline to give some working room. The goal is to have the knot tight and the left eye the right size opening, about line diameter.
- Adjust the lines until you can tighten everything up and have the eyes just right. Next you need to set the knots.
- I use this 4x4 with a number of holes drilled in it and a couple of 1/4 inch bolts or spikes. I put the left hand eye in one bolt and use the other as a fulcrum for a pair of vice grip pliers that can then pull very hard on the lines. You may also need to put the spike through the right hand eye and pull to tighten the two knots together at some point. Do the tightning a bit at a time and adjust the knots if needed before they get impossibly tight.

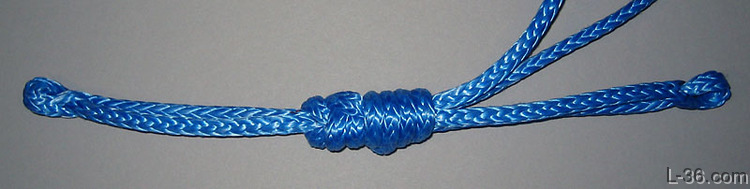
- You should now have a very tight set of knots in the center of the shackle.
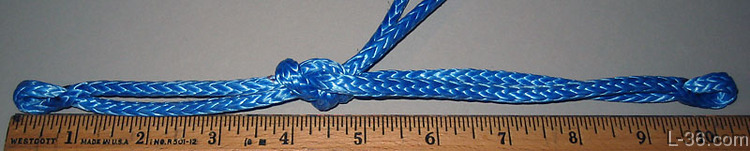
- Tie the diamond knot and adjust its position to give the size shackle opening that you want.
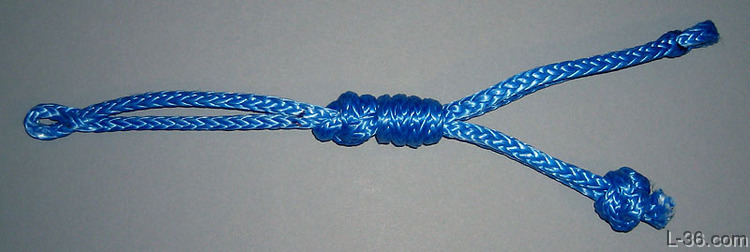
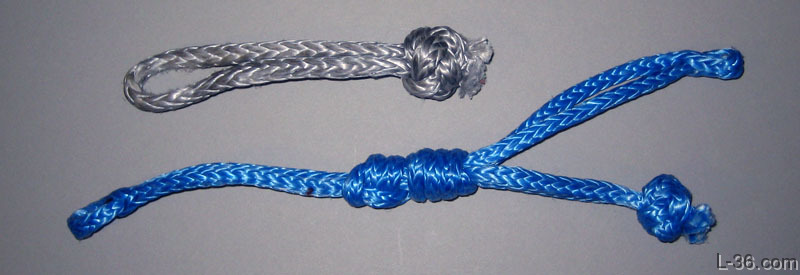
- This is the finished shackle
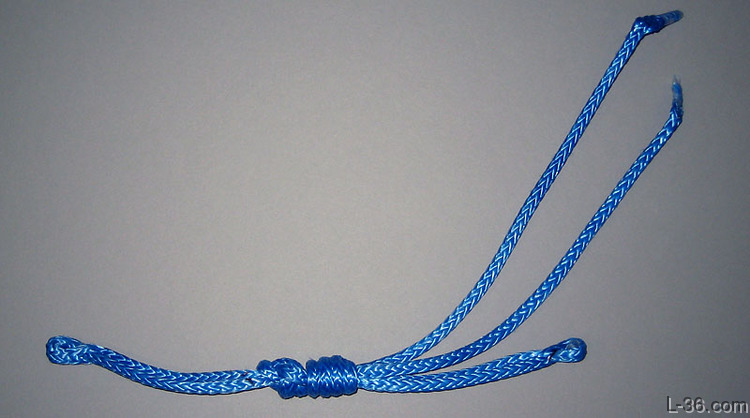
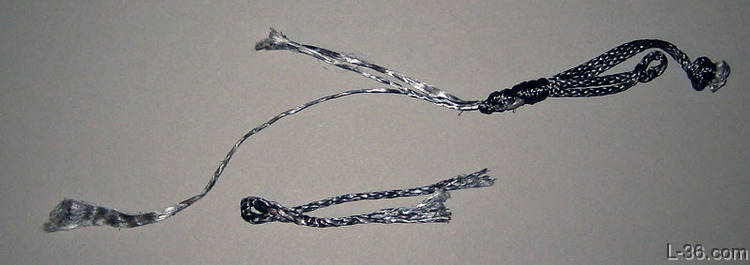
- This is a picture of the 7/64 shackle after testing it to destruction. With simpler knots, failure happened at less force and it was clear which knot failed. This final version was clearly the strongest and the failure happened in multiple places indicating that many parts were near failure and when the first let go, the rest went as well. I would love to have a load cell to measure the actual force so if anyone wants to donate one...
Version 1
Version 2
Version 3
NOTICE: Some pages have affiliate links to Amazon. As an Amazon Associate, I earn from qualifying purchases. Please read website Cookie, Privacy, and Disclamers by clicking HERE. To contact me click HERE. For my YouTube page click HERE