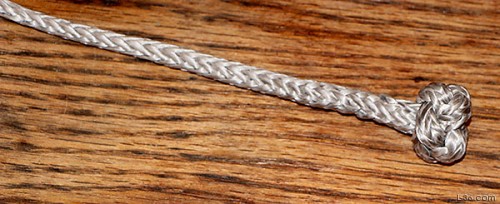
Soft Toggle Halyard
This soft toggle is used as a way to hold up a halyard to the mainsail. It has an advantage that the line going into the sheave is not thickened by the bury section you would have if you used a metal toggle. It is secure because it is basically a knot. It will not slip because the button involves a brined splice to strengthen it. To untie, you need to work the halyard through the knot and the rest is easy. Start by tying a Chinese button knot on the end of your line. Try and leave about a fid length of the working end sticking out of the knot when you are done. See Chinese Button Knot HOWTO for instructions.
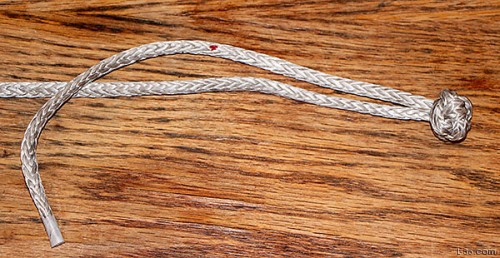 |
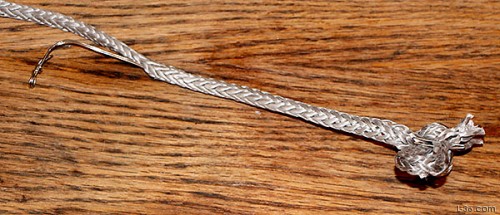
Tie a Chinese Button Knot in the end of your halyard. See HERE for instructions how to tie this using only one end of the line. Make sure the button knot is very tight. It might be good to put a line shackle on the button and really pull on it before continugin with the rest of these instructions. |
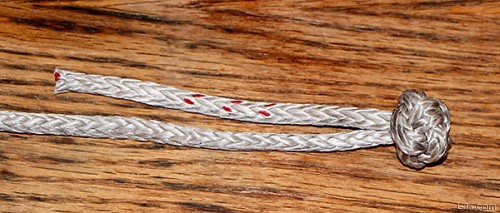 |
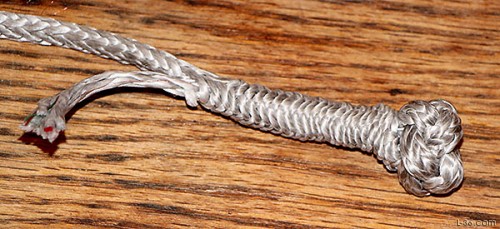
Cut the tail to one fid length (21 diameters) Mark every other strand pair about half way as shown. You might want this length to be more so that some part of the buried section ends up above the knot to improve the strength. |
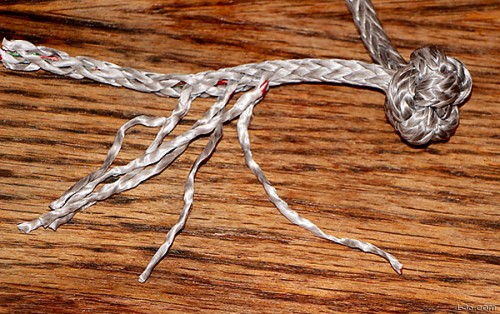 |
Pull the marked strands out. |
 |
Cut them off. This allows the wire fid to grab about half way on this thinner section so that when doubled it will easily slide inside the splice. |
 |
Insert the fid about 25% further down the line then the length of the tail or about 1.25 fid lengths. |
 |
Pull the tail thought and pull the end out. It is not easy to get all of the bury inside the other line. Pay particular attension to the section right at the knot and make sure the buried strands are all the way inside. |
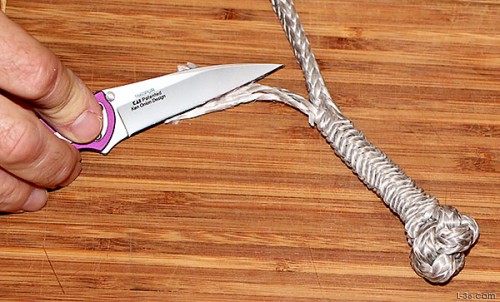 |
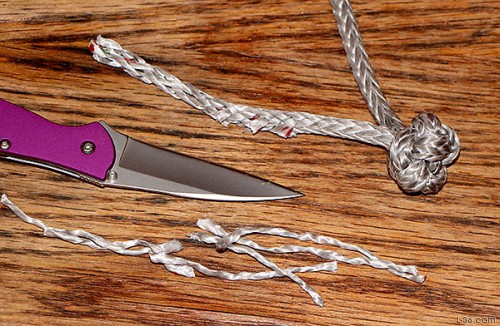
Taper the end by cutting at a shallow angle |
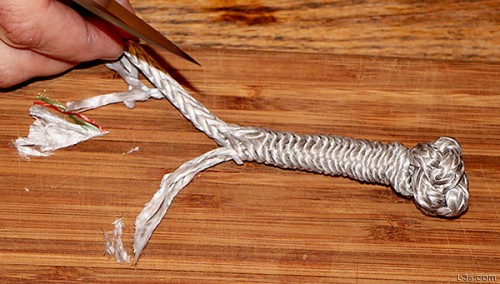 |
Here I had to do a second cut to taper the last two strands. |
 |
Milk the tail back inside the main section. I did not do that here, but you should stitch the line starting at the knot and put 8 stitches moving away from the knot. Then rotate the line 90 degrees and put 8 going back the other way. These are S stitches, not locked stitches. |
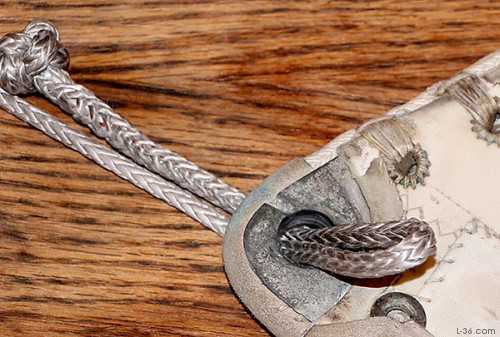 |
To use this soft toggle, insert a loop of the bright through the headboard. |
 |
Pass the button through the loop. |
 |
Here is the trick. Pull the loop back out of the headboard. This forms a reverses loop on the other side of the headboard. |
 |
If your knot is large enough that there is now way it can go through the headboard hole, you are done. For extra security, pass the button through this new loop.
If you want to be able to untie the knot easily, don't have the two lines going throug the hole in the headboard cross over each other. That is determined by which side of the loop you tuck the button. |
 |
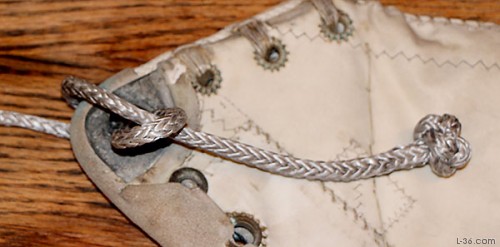
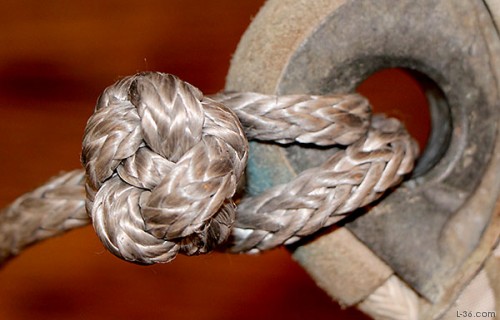
Tighten the knot up and adjust it so that the halyard will pull straight on the top of the headboard and not on the side. |
 |
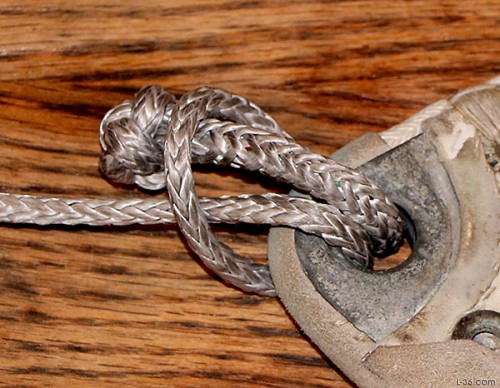
Here is a close up view |
 |
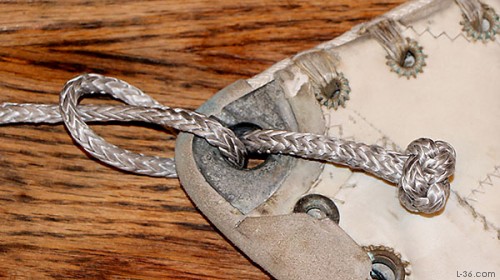
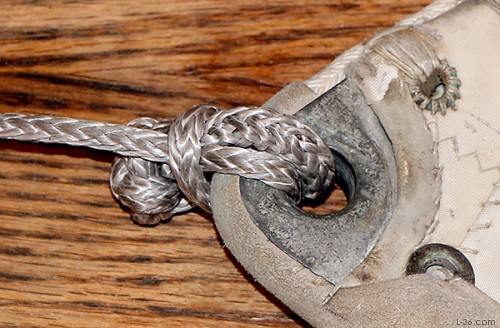
Here is the other side |
 |
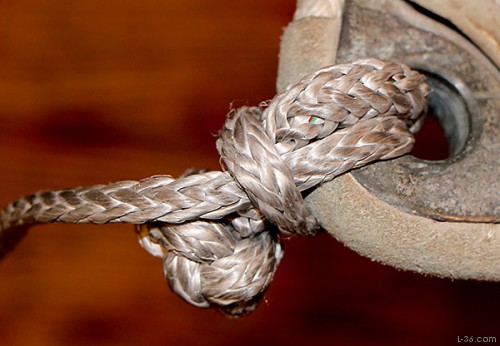
Here is a side view. |
To untie the knot, press sideways on the loop where the halyard standing part enters the knot. That should free up enough slack to thread the halyard through the knot. Once you get a little slack, the rest is easy.
NOTICE: Some pages have affiliate links to Amazon. As an Amazon Associate, I earn from qualifying purchases. Please read website Cookie, Privacy, and Disclamers by clicking HERE. To contact me click HERE. For my YouTube page click HERE