Loops, Loups, and Loupes
Making continuous loops with Amsteel
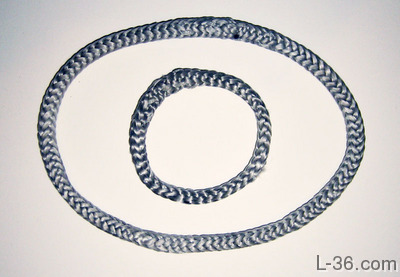
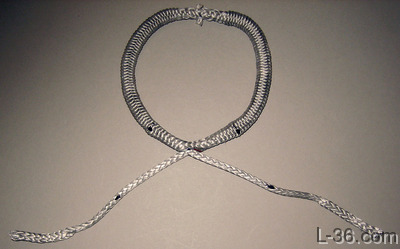
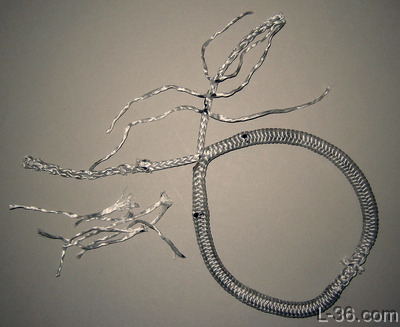
A couple of years ago I made some loops out of amsteel. Most recently one of the L-36.com users asked me to write up how to make some loops. About the same time, I both discovered how the expensive professional ones are made and found that some loops that look very similar to the ones I made are being offered commercially. I made up a couple more of the loops, shown below, and researched one construction detail to try and make sure they were strong. Below is a HowTo on what I did. I hope you enjoy it.
Introduction
I should point out that if the core overlap was perfect, the loop in loading would have four times the strength of the line theoretically. (Structures never achieve theoretical strength, it is just a starting point for computation). In use, these loops will be going around a shackle with a tight bend radius. That is going to produce a loss of about 50% of strength. In designing this loop, the crossover region was of great concern. More crossover would produce more strength but would also make the loop more difficult to make. Normally a line like spectra would have overlaps of 3 fid lengths or 60 to 72 diameters. That is to prevent the core from slipping out of the splice. In this loop, there is no way the core is going to slip out because the bury is the entire length of the loop and additionally the tight bend at the attachment will lock the structure. So the only concern is transfer of the load from one end of the inner core to the other when the structure is under great load. Remember that we already have a 50% strength loss due to the tight bend so regardless of the strength of the crossover, the tight bend over the shackle is going to be the weak point. In the end, I went with just a bit over one fid length for the overlap, same as one would use with traditional double braid. However, these are too strong for me to test so I have to leave the determination of strength as an exercise for the reader.
Other Construction Geometric
The more expensive loups are made with a cover over multiple turns of a smaller core. This should be very strong and has the advantage of a nice smooth cover. I would consider them much nicer than these. The disadvantage is that they are $100 each. The loupes that can be bought for around $30 look like these. I think that is a fair price for the material and labor involved. I do not know if they are stronger or weaker. Their published strength numbers are about what I would expect for what I am presenting here although I have not done the tests to prove it. I present this for the DYI enthusiast. The simplest geometer is to just do an end splice on line and not have a double core. Brion Toss presents how to do this using a brummel crossover in his Book 5. Don't try and figure out how to do it, you have to read the book. As was said on one of the forums, he cheats. Otherwise it cannot be done. You could also make a simple end splice with a lock stitch.Instructions
|
|
|
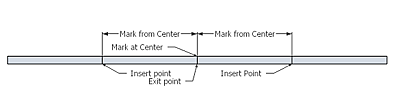 |
Using the numbers from the calculator, mark the line as shown in the sketch to the left.
|
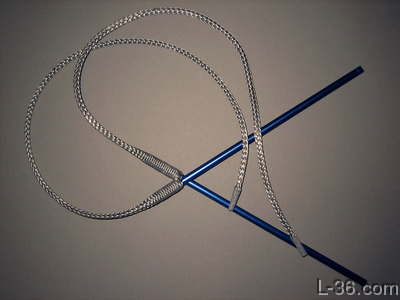 |
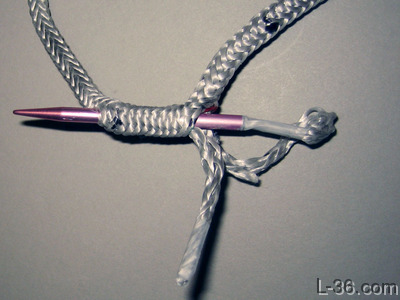
At the middle mark, make the exit opening you will use later. Insert your fid in the opening and make a mice path in both directions. Here I use two fids (knitting needles) to make sure both directions are clear at the same time. This will help later in making sure both ends exit the loop at the same point. |
 |
In the photo to the left, I colored the edges of the opening so I would be sure to know exactly which strands to leave to port and which to leave to starboard. |
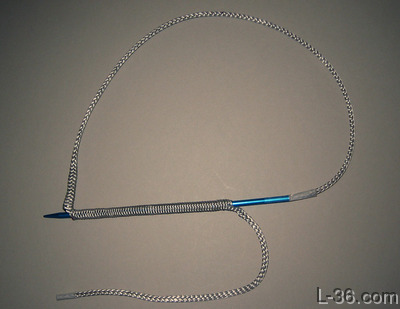 |
Insert each end at the mark on the other half and bring pull then out through the mid way hole. Again I use a knitting needle and a long piece of scotch tape. I have tried all kinds of tape from blue tape to exotic Teflon (million dollar) tape. Scotch tape works the best. |
 |
Do both ends. Then pull tight to close up the gap at the center. |
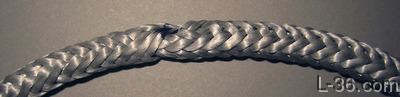 |
Pull the ends tight, then milk the center to get a nice transition. I did this a couple of times. |
 |
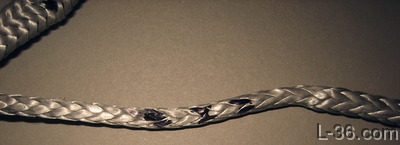
Lock stitch the crossover at the center of the line. Stitch on both sides of the crossover. It is a nice touch to shove the knots down inside the outer braid and cut the thread off flush. A side note here that applies to all lock stitching. Use an "S" stitch and not a locking stitch like you get with a speedy stitcher. Under load, the line will stretch and the lock stitch needs to expand. I have seen many lock stitches snap under load. This does not change the ultimate strength in these destructive tests but might allow the splice to come apart if extremely heavily loaded then released. Obviously, I am talking about loads well in excess of the SWL but still... |
 |
Next pull hard on the loop. Your goal is to suck as much of the core into the cover as is ever going to happen. This will help to keep little dents from forming if the core tapers get pulled away from each other. |
 |
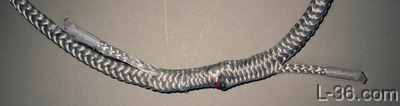
To the left is the design of the core overlap. This is the goal of the remaining steps. The dual tapers match and produce a constant diameter loop. Without the taper, you would have to have an exact alignment of the cores and that is impossible. The taper allows you to have the alignment slightly off and have the change in diameter be insignificant. The taper means that any misalignment will produce a small smooth bump or indentation instead of a large abrupt one. |
 |
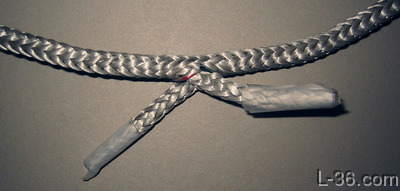
Take the tape off the ends. Make sure you do not pull out any of the core. Lay the core down over the cover and mark the length where the core ends. |
 |
Separate the cover at these marks and press a marker through the cover and mark the core. |
 |
Pull the cores out and make sure they got marked. |
 |
Using your mark as the first mark, mark a left hand and right hand strand until you have marked three pairs for a total of 6 strands. Do the same on the other end. Make note of the length of the taper. |
 |
Pull these strands out and cut them off. This is half your taper. Tape the ends with a small piece of scotch tape. Then pull everything tight to pull the core back into the cover. |
 |
Attach your fid to one of the ends and insert it in the opening. You will want a small diameter fid. Go a bit past the mark on the cover. |
 |
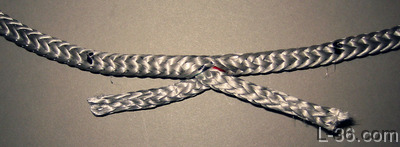
Repeat the above steps for the other section of core. The second insert is difficult as working space is tight. I used a pulling fid made of a section of piano wire folded in half. A small Toss fid would be great although I don't know if he makes them small enough. You will appreciate the red and green markings when you go to insert this final core back through that same opening. Once both sections are burried smooth the cover out. You should not do the cut taper explined below until you have smoothed the cover out to get rid of the traces of the opening. |
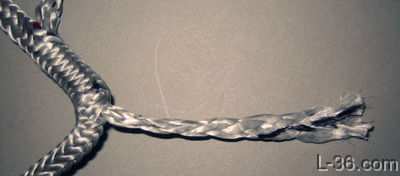 |
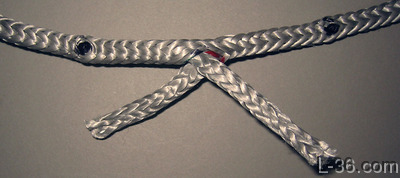
Remove the tape and spread the strands out a bit. Remembering how long the taper was from the earlier step, cut the end diagonally across that length, I have marked where the cut will be in the picture to the left just for clarity. |
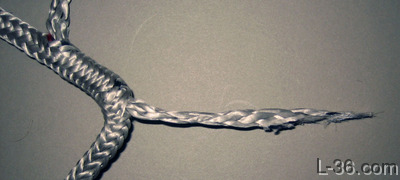 |
Here is the taper. |
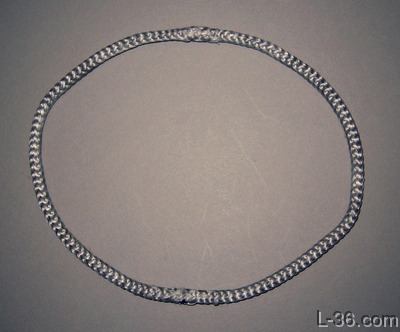 |
Pull everything tight. As I said, make sure the hole is closed up before you have let go completely of the ends. There is a tendency for a hernia to form at this point if the cover has not returned to its natual shape. I had to add a lock stitch on this one because the hole was still open after I pulled the ends back inside the cover. This did not happen on the previous ones I built but I had not opened up the exit hole as much as I did this time. Next time I will have the benefit of these instructions so it will go more smoothly :-) |
NOTICE: Some pages have affiliate links to Amazon. As an Amazon Associate, I earn from qualifying purchases. Please read website Cookie, Privacy, and Disclamers by clicking HERE. To contact me click HERE. For my YouTube page click HERE