Soft Shackles
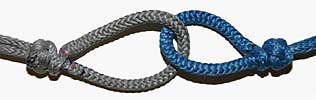
Soft Shackle How To
By Allen Edwards
This page shows how to make the classic soft shackle. Click HERE for a much improved version. The calculator on that version will work in mm or inches as well.
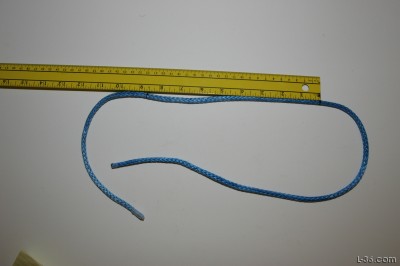
We are going to make a soft shackle out of 3/16 Amsteel Blue. We want one that when closed has a 6 inch inter circumference or a 1.9 inch inner diameter. We know from experience that this requires an 8 inch long open shackle as measured from the tip to the inner edge of the diamond knot. We also know you need about 10 inches of line from the end of the shackle to make the diamond knot. The total line length needed is 37.4 inches. Try and be close to exact on the length although there is a step where it can be cut later. We make a mark 10 inches from one end and another mark 8.625 (8 5/8) from that first mark. If you want a longer shackle, (use the calculator below or) make this second mark the amount you want longer times 1.175. Then make the line that amount plus the desired extra distance longer. For example, if you want a 10 inch shackle, make the first mark at 10 inches but the second mark at 11 inches and make the line 4.35 inches longer (41 3/4 inches long). The shackle has and inner and an outer section so to increase the shackle length by one inch you need to add 2 inches plus the amount that the outer section shrinks from having the inner section in it. The outer section will be 85% of its original length once the inner line is in place. Multiplying by 1.175 allows for this shrinkage.
Version 4
The previous version was giving me some problems so I did some calculations again and came up with the numbers above. Please let me know how it works out for you. The goal is to avoid having to cut either tail to make the equal before you tie the diamond knot. That discussion on sizes was a little complicated. Maybe this calculator will help. Enter the length and size of your Amsteel and the calculator will do the calculations for you. It will also show the approximate size of the finished shackle. The two sizes listed disserve some discussion. Because the shackle has to go over the diamond knot, the amount of "stuff" that the shackle can go over (listed as capacity) is less than the size of the shackle closed would indicate. This calculation takes the thickness of the shackle into account so you will see that the ID is not just the length divided by pi. These calculations are approximate as there are variations in how the shackle comes out. They are based on tightening the knot as described in this article. You can make the shackle considerably longer if the knot is not right at the cross through described below. All calculations are rounded to 1/8 inch increments. Dimnensions are in inches.
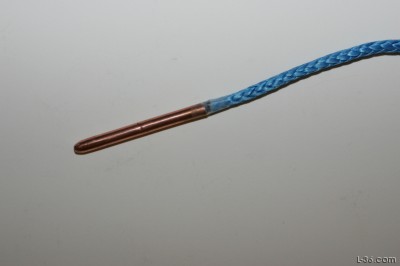
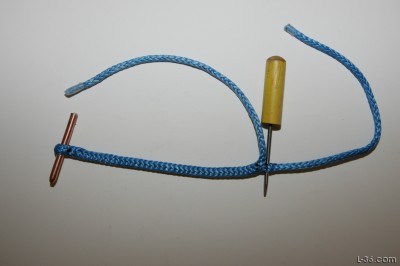
Tape off both ends of the line. I find scotch tape works the best. For the fid, I like using a fid made of 1/4 inch copper tubing that has been gently pounded into a point with a hammer, working around slowly to get a nice point with a small hollow left. I then polish it on a buffing wheel. You can use commercial fids as well. Tape the fid to the end farthest from the marks with some smooth tape. Scotch tape works very well as does green tape. Blue masking tape, not so well.
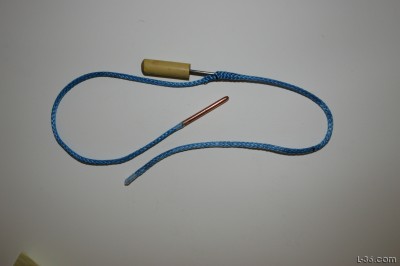
Insert a dull pick at the second mark near the middle of the rope. I like to use a dull pick made from an old yard sign from the last election ground to a very dull point and polished so it is very smooth. (Kind of like my brain after listening to the political ads.) I drill a hole in an old broom stick for the handle. (Broom stick borrowed from recent Senatorial candidate.) A small knitting needle works great as well. Gently press this tool into the center of the Amsteel being careful not to snag any strands. It helps to insert it quite some distance.

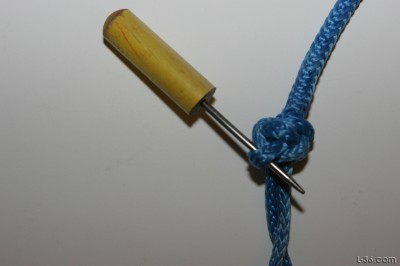
Now that you have a nice opening, remove the dull pick and insert your fid.
Work the fid in along the line until you reach the first mark. Work the fid out of the line at this mark. It helps to twist the fid gently back and forth as you pull it out.
Pull the line out at the mark.
Remove your fid and place it in the eye you just formed. Bunch the line up toward the eye.
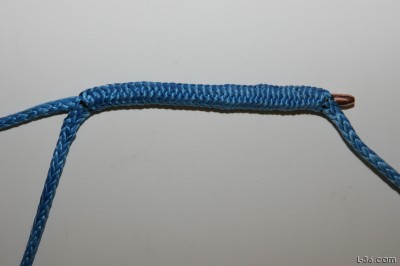
Carefully milk the outer section back away from the eye end. Do this several times, crunching it up against the fid and smoothing it out just to get the rope comfortable. The rope should be smooth from the eye, which is tight against the fid, to the exit point.
Mark the inner line at the point where it exits the outer section. Insert your dull pick through the center of the line. Work this around to make a fairly large hole.
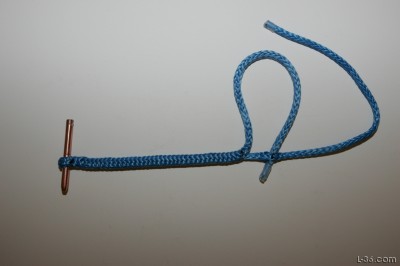
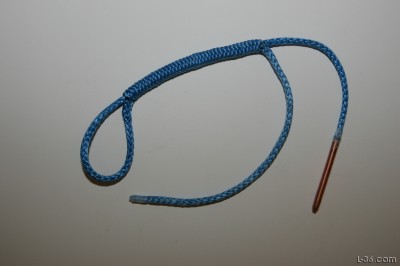
Insert the outer section through the inner section and pull it tight.
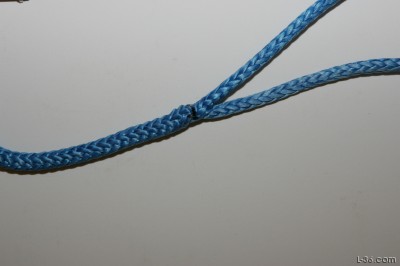
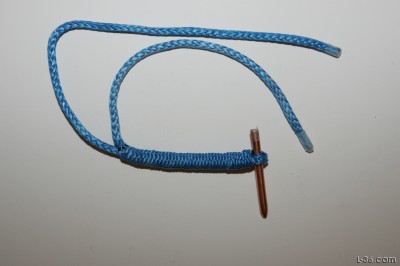
Pull the outer section then the inner section until they are smooth and there is no gap showing at the exit point. Repeat this until they are so smooth you can hardly see where the lines cross.
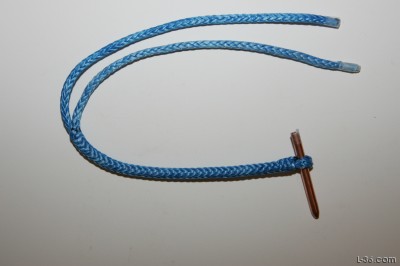
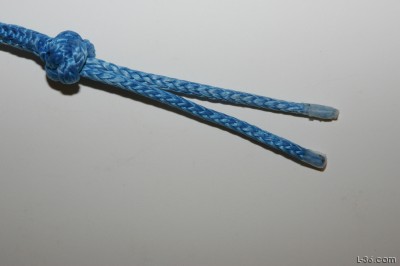
At this point, the two carefully measured ends should line up exactly. If not, cut the longer one so they are both the same length. It is important that they are the same length so that you can make the diamond knot come out right.
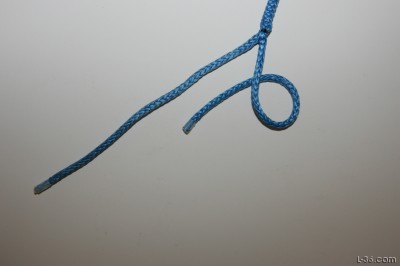
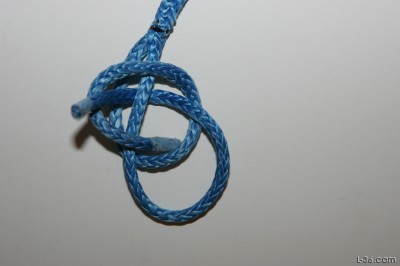
We are now going to tie the diamond knot. You can also look HERE for a discussion on how to tie a diamond knot that includes a little animated gif. You start by looping one of the ends under itself.
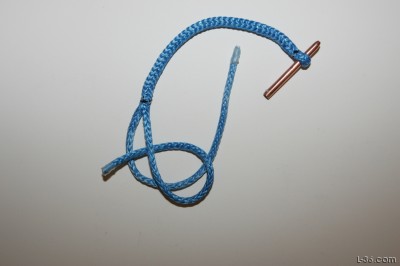
Next place the second end under the loop made with the first end.
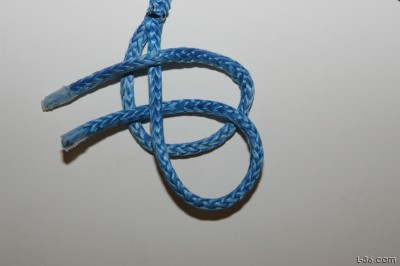
This second end then goes over the standing part of the first end.
Then under the working part of the first end.
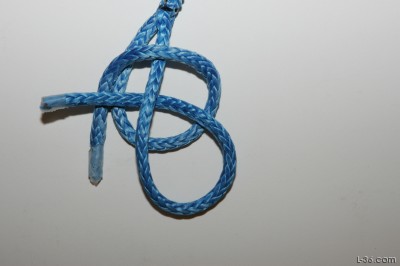
Then over the first edge of the loop.
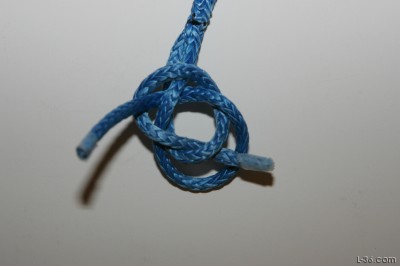
Then under its own standing part which is under the loop and finally over the other edge of the loop.
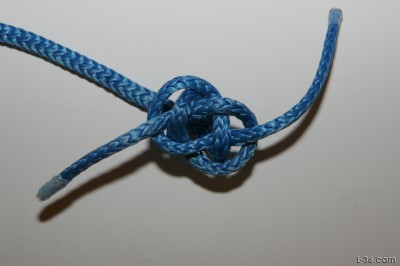
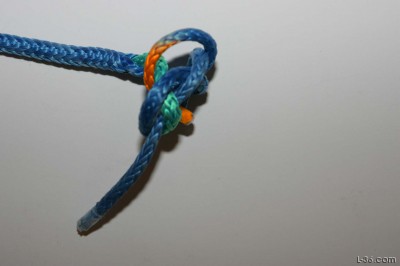
Neaten up the knot. This is a Carrick bend (technically a double carrick bend). Make the knot open with one inch legs from the end of the shackle to the start of the Carrick bend. This square opening is important so make sure it is easy to spot and fairly open. The next step is to take the two working ends and wrap them around the two legs and up through this opening from the bottom up. Notice that the two working ends exit opposite sides of the knot. If you tied it with both working ends pointing in the same direction, it won't work, go back to the start of the know section.
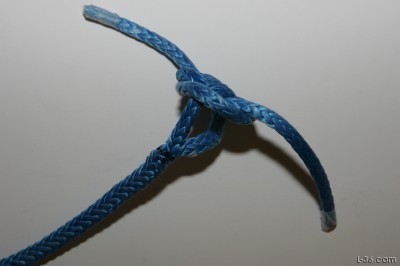
Here you can see the neat knot with the two one inch legs between the end of the shackle and the knot.
Here is where we take one of the working ends (orange) around the next one inch leg (green) in the same angular direction (counter clockwise) that the line is traversing in the Carrick knot and up through the center of the knot, the square open area in the center of the Carrick we discussed just a bit ago. (Isn't Photoshop great!)
Repeat this with the other end. This is a lot easier to see in the section on the diamond knot.
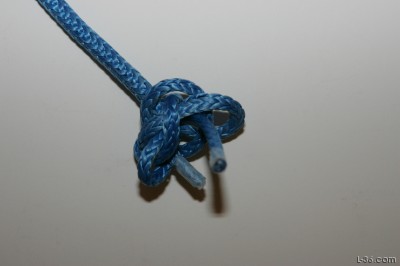
What we are doing here is taking up all the line from the end of the shackle to the knot. In other words, we are making our 1 inch legs zero inches. Pull up starting on the piece of the knot near the shackle, then go around the knot tightening that strand as it goes over and under the other strand. Go counter-clockwise 5 times then pull the tail end.
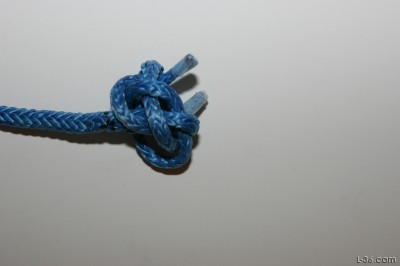
Do this several times and the knot will tighten up with no space between the knot and the mark at the end of the shackle. The two working ends should line up.
As the knot gets tighter, use your dull pick to further tighten the knot, working around counter-clockwise until you pull on the corresponding working end.
To really tighten the knot, put the two ends (lined up) in a bench vice and pull like crazy on the fid or a similarly sized rod through the eye. You can even put one end at a time in the vice an pull even tighter but be careful to make sure the two ends finish the same length.
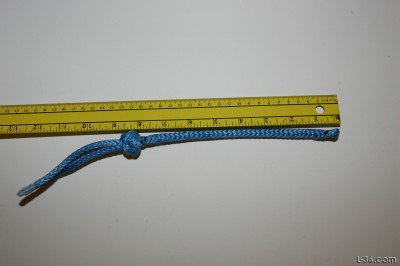
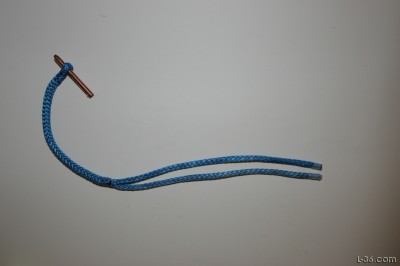
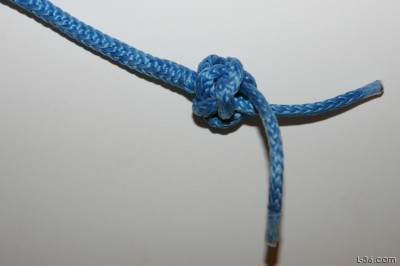
Our finished shackle is the length we wanted.
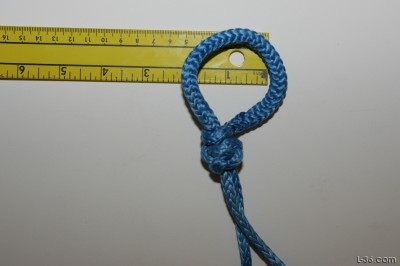
It is also the diameter we wanted!
Note that until you are sure that the knot is tight, don't cut off the ends as the shackle can tighten and pull in those ends as it does it. When the knot is really tight, banging it on the table is like hitting the table with a marble. It gets very hard. I leave the ends there so that I can re-adjust the length if I want. You can leave a section of the shackle between the end tuck and the knot to lengthen it.
How strong are these things? Don't know but I did try and find out. See discussion and video Soft Shackle Testing to find out what I did.
NOTICE: Some pages have affiliate links to Amazon. As an Amazon Associate, I earn from qualifying purchases. Please read website Cookie, Privacy, and Disclamers by clicking HERE. To contact me click HERE. For my YouTube page click HERE