Soft Shackles
How to Tie A Button Knot
(knot credit to Brion Toss)
By Allen Edwards
Introduction
A conventional soft shackle has two strands and is doubled over so some people think that makes it four times as strong as the line it is made from. But there is a weak point at the base of the diamond knot that greatly reduces the strength. The result is that the soft shackle ends up about the strength of the line it is made from. I got the idea that if the tail of the diamond knot could come out the bottom and be tucked inside the line entering the knot that the strength of the knot would be doubled. I tried this and it was a lot stronger but my knot capsized which then became the limiting factor. Brion Toss came up with this button knot which was stable and had the ends coming out the bottom of the knot. The only problem was it was very difficult to tie. Using his instructions, it took be half a dozen tries to actually tie one and I wasn't even sure what I had done. I slowly untied it, taking a photo at every step. This tutorial is those photos shown in reverse order. I personally don't like this stronger soft shackle because it is so hard to learn to tie. If I want a stronger soft shackle, I use stronger line. But there are cases where there is a confined space and a stronger soft shackle is a good solution. Securing anchor chain, which was the inspiration for this design, is one such example.
Brion published instructions on how to tie the knot. I tried several times, mostly unsuccessfully, to tie it. One time I got it right and carefully untied it taking pictures of each step. This a presentation of those pictures in reverse order. Enjoy.
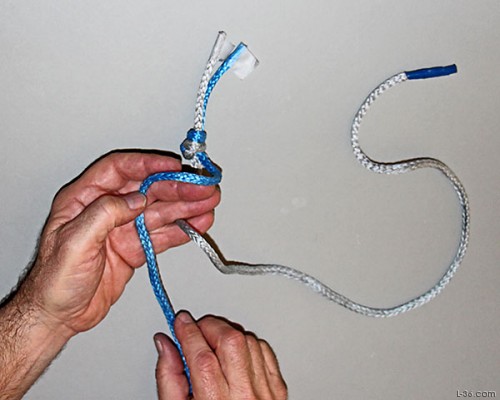
This button knot is different than a diamond knot because the tails come out in the same place as the standing part enters the knot. This allows the tails to be buried into the standing parts. That effectively doubles the strength of the knot compared to a diamond knot. Because the diamond knot is the weak link in a soft shackle, this knot will greatly increase the strength of a soft shackle. It will not double it because the eye becomes the weak link but it even increases the strength of the eye by increasing the radius that the eye is grabbing. In this tutorial, the eye of the soft shackle would be where the knot is connecting these two different color lines.
Loop one strand around the other. The loop working end goes above the bright.
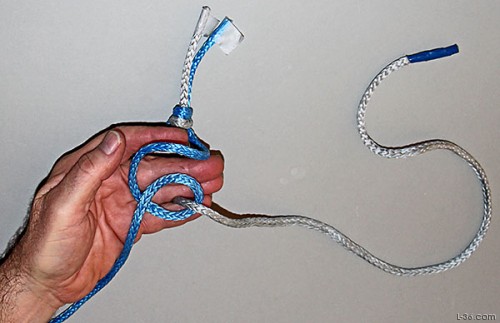
Then take the second strand around the first strand and up. Note that the working end is above the other strand. Observe that there are two loops. There is the first loop you formed and the one you just formed in this step. The first loop should be closer to the end you just brought up and over the first strand (blue). Your goal is to go under the first loop and over the second.
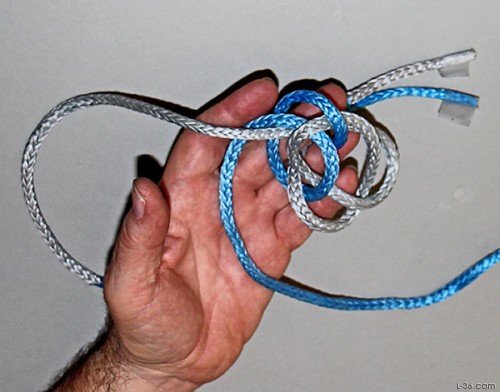
Continue with that strand and put it down through the loop of the first (blue) strand and up over its own bright.
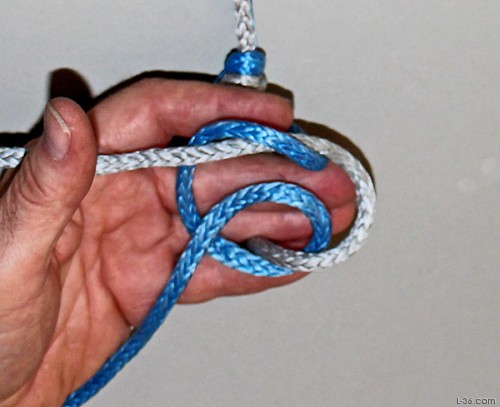
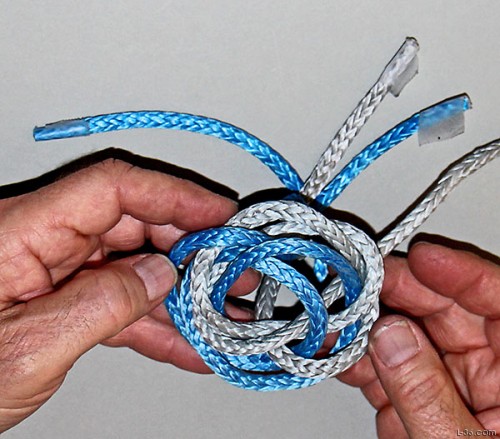
This is what you should have at this point. If it doesn't look like this, arrange it until it does. It is very important to take a bit of time here to make what you have look like the picture. Most important is to get the two large openings that have the working end passing near the part of the loop closest to the standing part. In other words, the loops are counterclockwise and make a gentle loop, not a sharp bend. It might help to put one finger through each of these larger openings as you are going to put the tails up through them and keeping your finger there will maintain where the tails should go.
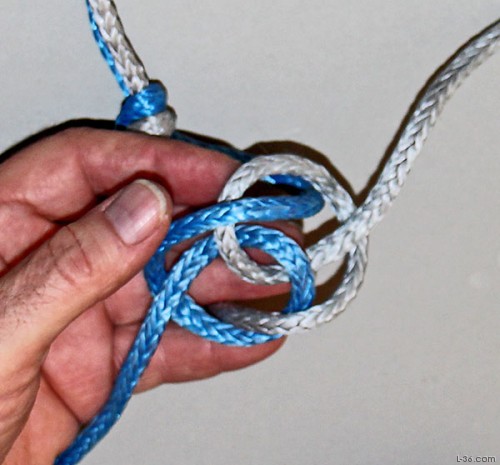
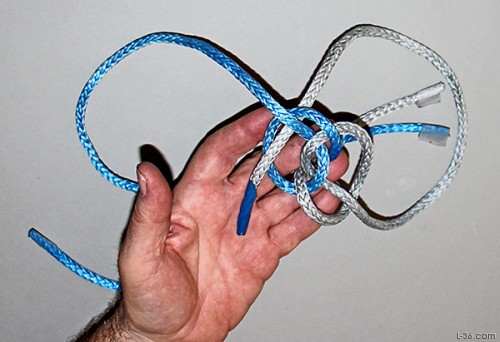
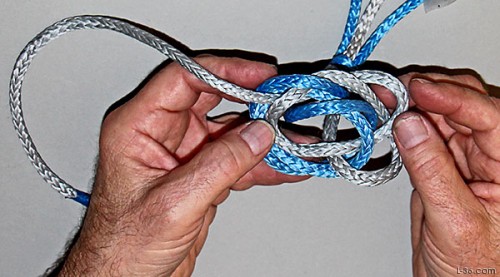
There are two large openings in the working part of this knot. Take one end and tuck it up through the opposite one of these large openings. Notice that the tail goes under two strands and up through the opening. If you put your fingers through the openings, just put the line where your finger is, but up from the bottom and out the top of the openings.
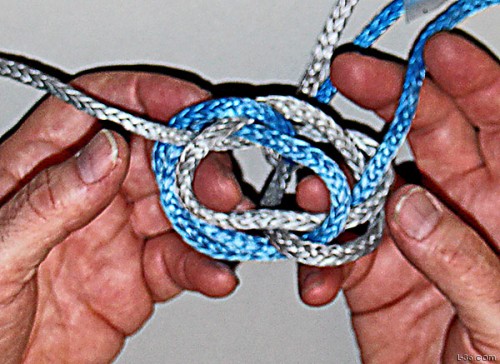
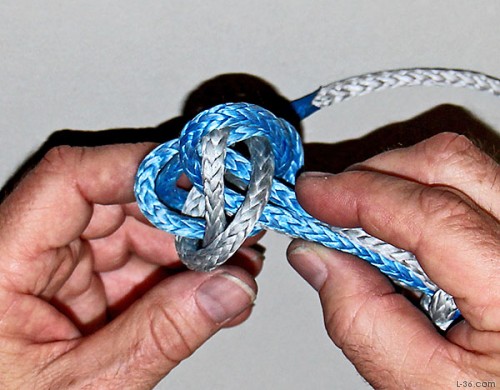
Continue pulling it through the opening. Next we are going to put the other tail under two strands and up through the opening where my little finger is in this picture.
Take the other tail and thread it up through the other similar but opposite opening. You are taking the tail and passing it under the two loops and up thought the opening that they create. If you did put your fingers through these openings two steps back, pass the line in the direction from your knuckle to your fingernail.
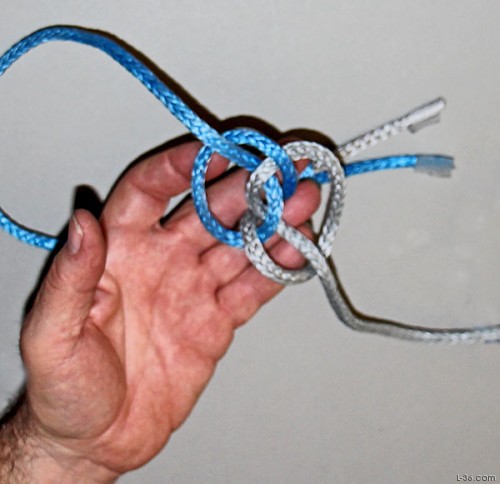
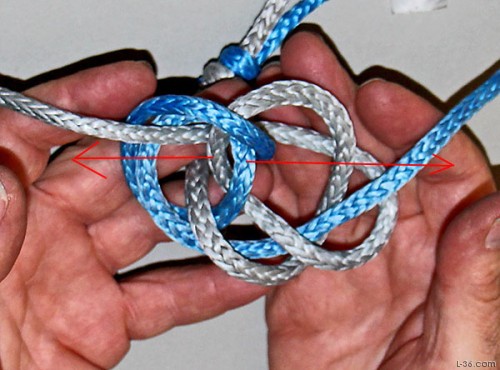
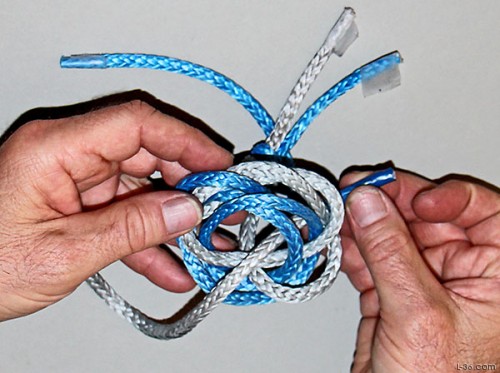
Pull it through and check that it looks like this. This is another point where you should take a bit of time and arrange your lines to look like this picture. You need to identify the two strands in the center that have the red arrows on them. These need to be pulled apart to open up the center of the knot in preparation for the final tucks.
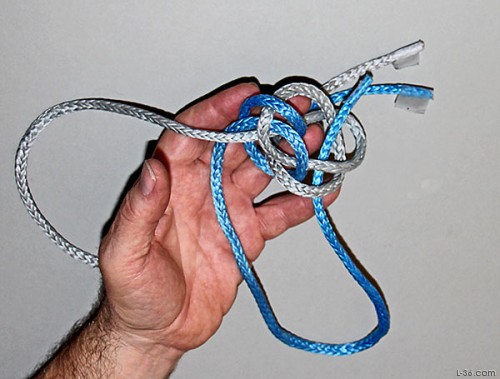
Open up the center, where they the two strands crossed each other by pulling those crossing strands apart. You can see my fingers coming up through the center opening. We are going to take the tail in my right hand and put it down the opening that my finger from my left hand is occupying.
Pull that tail down the opposite opening. I didn't do it that way in the picture, but it might help to put the first strand down the opening you free up with the hand you will use to do the tuck. That will allow your other hand to keep marking the place where the second tuck will go. When you do the tucks, cross the lines from the standing part.
Pull it all the way through.
Now take the other tail and thread it down through the other opening.
The knot is now finished and just needs to be tightened up.
All four ends of the lines, the two standing ends and the two tails, should all be next to each other coming out the bottom of the knot.
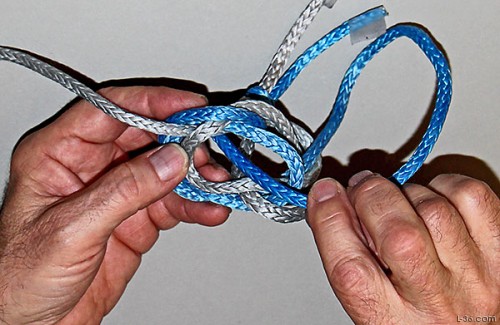
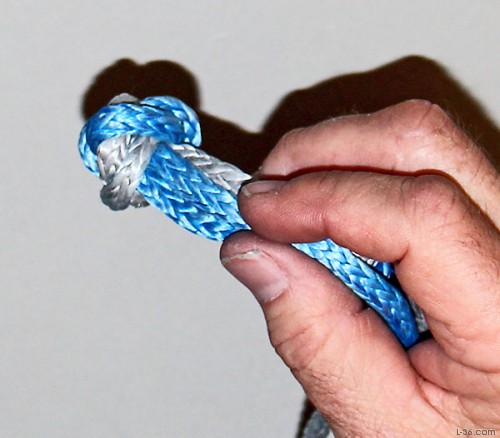
Here is what it looks like from the side. Now dress the knot by milking each strand around and ultimately pulling down on the tails.
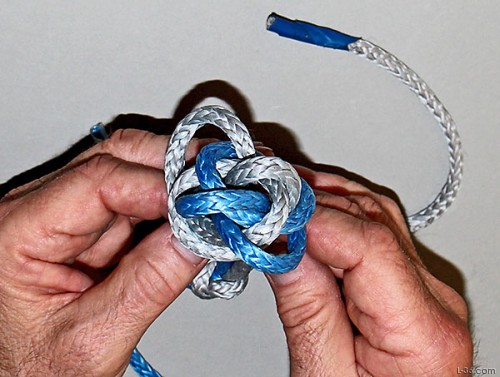
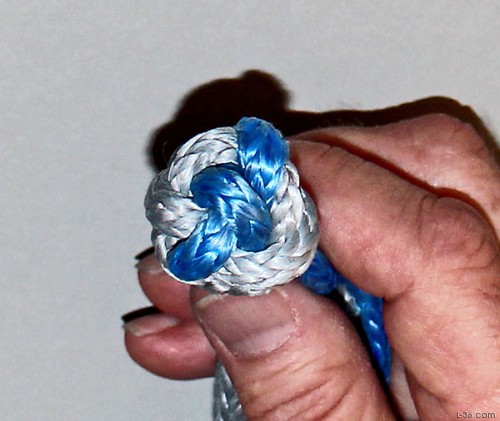
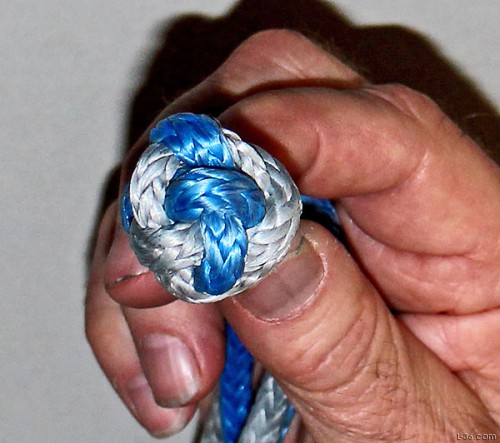
Here is the finished knot from the top
Here it is from one side.
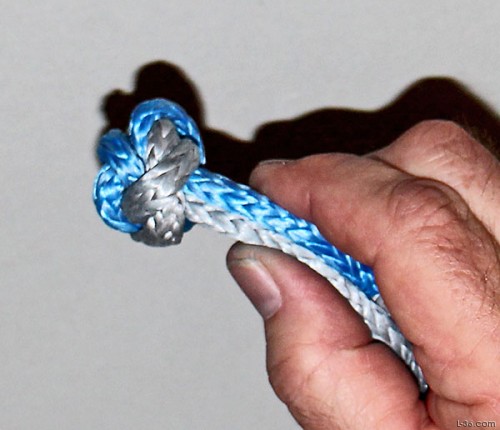
And from the other side.
And again from the top.
NOTICE: Some pages have affiliate links to Amazon. As an Amazon Associate, I earn from qualifying purchases.
Please read website Cookie, Privacy, and Disclamers by clicking
HERE.
To contact me click
HERE. For my YouTube page click
HERE