Soft Shackles
How to Tie a Diamond Knot
By Allen Edwards
The diamond knot has become popular because it is an excellent knot for tying soft shackles. This page shows how to tie one. I use a blue and gray rope and will call them by color although in reality both will likely be the same color if you are finishing up a soft shackle as they will be two ends of the same piece of line. To see an animation of the knot,
click here.
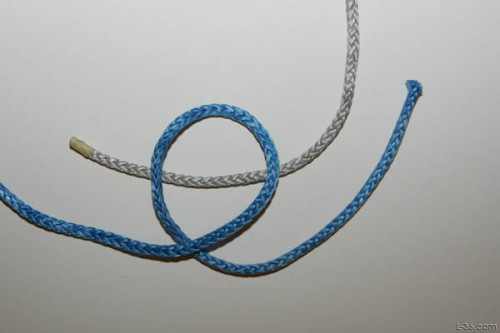
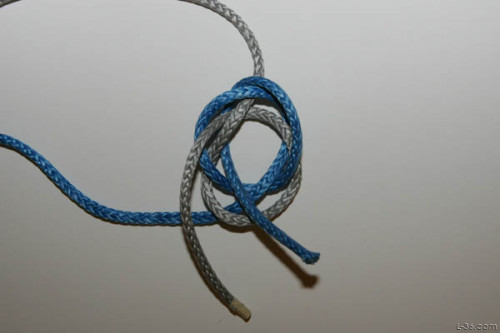
Start with a loop in the blue line with the working end going under the standing part. This loop will go over the gray line with the two working ends pointing in different directions. It is helpful if you have cut the two ends so that when the standing part is aligned as it should be, the two working ends are exactly the same length. This will help when it comes time to tighten the knot. As you pull on each end to lock the knot, you work them so the working ends line up. More on that later.
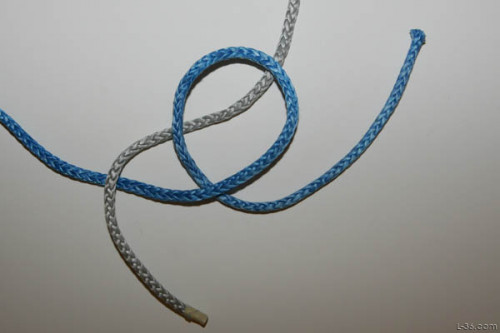
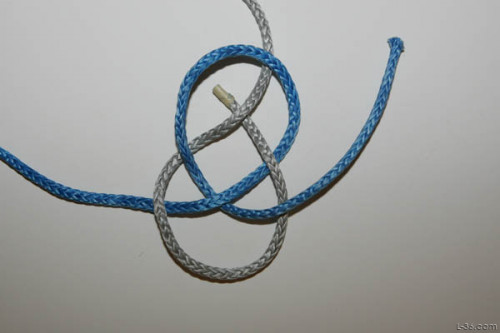
We will now take the gray line and take it over-under-over-under-over. Start by taking it over the standing part of the blue line.
Then under the working end of the blue line.
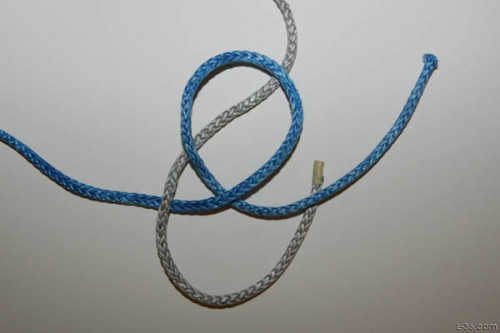
Then over the first part of the loop in the blue line.
Then under the part of itself that is under the loop.
And finally over the last part of the loop in the blue line. You now have a Carrick Bend (or really a double carrick bend). That is the end of part one and time to neaten everything up so it looks nice and has a nice open middle part that is easily recognized. I think this is the most critical part of tying this knot. You really need to get the knot symmetric and adjust the tails so things are really clear at this point. In a soft shackle, you need to have about an inch of the standing part from where your brummel is to where the nicely straightened up neat looking knot is. The center needs to be open and it needs to be clear where the center is. The two ends come out on opposite sides of the carrick so they point away from each other. If you get this part looking good, the rest will be easy.
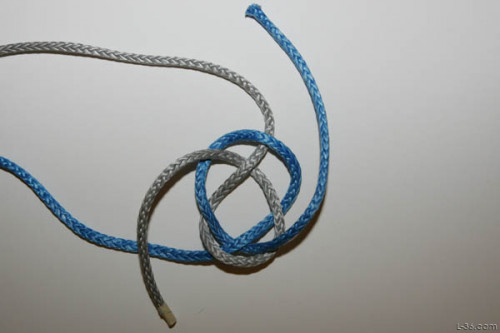
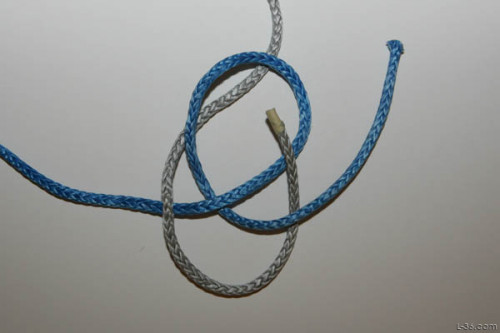
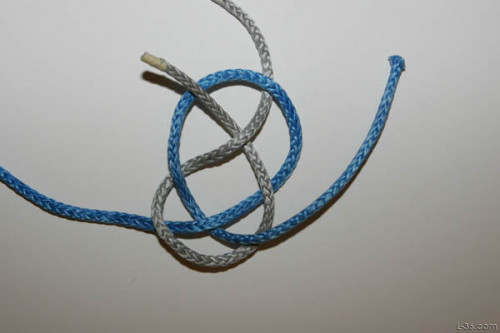
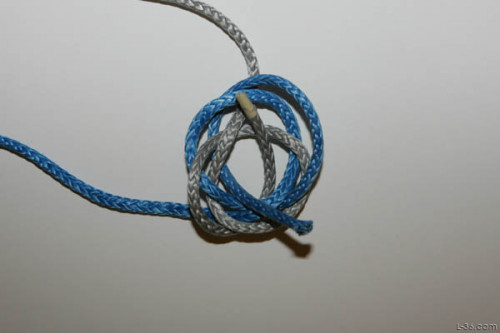
Notice in the picture above that each end, blue and gray, if continued around in the same direction (counter-clockwise), is pointing at the standing part of the opposite color. The goal now is to turn the carrick bend into a diamond knot. To do this we need to put each working end over the standing part that it is pointing at and then up through the center section of the carrick bend. In the picture to the left, the gray working end is now over the blue standing part.
Next take the blue working end over the gray standing part,
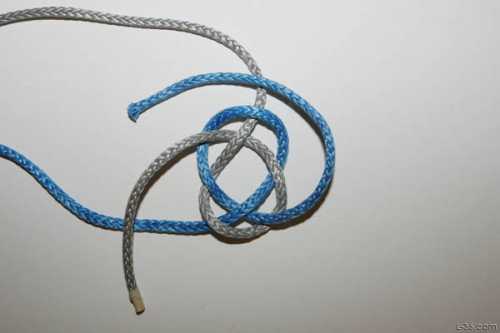
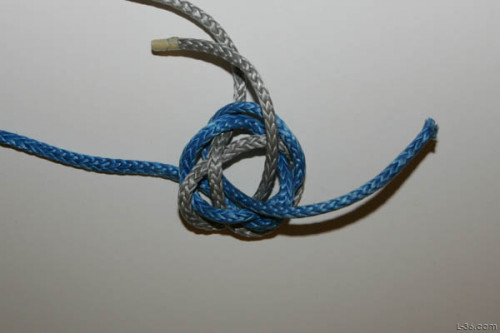
Now the blue working end is taken under the knot and up through the open center.
Pull it up through the center section so it won't slip back down
Now repeat with the gray end. Remember, each end goes over the standing part of the other line and then under the knot and up through the center section of the carrage bend.
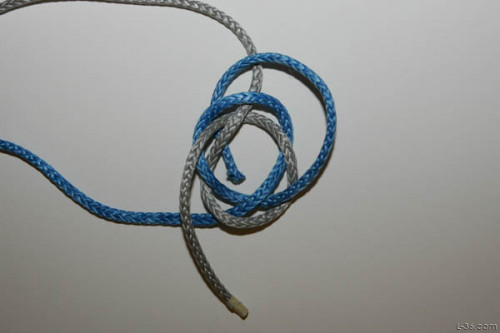
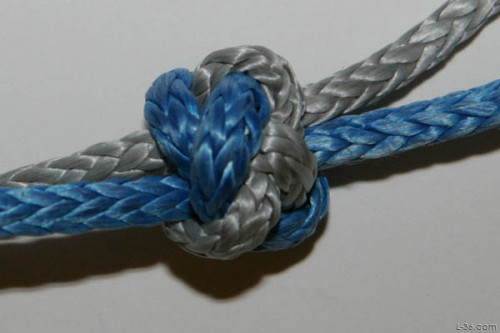
Tighten the knot up moving it in the direction desired to place it where you want it on the lines. At this point you can position your knot on the line before you tighten it up. You may want to move it down to eliminate that inch gap I told you to leave. You may want to align it somewhere else. If you had the two ends cut to the same length, make sure they are aligned as you tighten the knot.
Keep tightening and you are done. To really lock it, place the working ends in a vice and grab the standing part and pull hard. This will set the knot.
To see an animation of the knot,
click here.
NOTICE: Some pages have affiliate links to Amazon. As an Amazon Associate, I earn from qualifying purchases.
Please read website Cookie, Privacy, and Disclamers by clicking
HERE.
To contact me click
HERE. For my YouTube page click
HERE