Electra
Interview with Roger DeWitte
I had the pleasure of meeting with Roger one fine Friday. We chatted for several hours as he looked over Papoose and commented on what was similar and what was different. I was impressed with the scope of what Roger is doing with Electra. He is basically rebuilding almost the entire boat. He has replaced the keel bolts, the floors and the frames. After he is done with that, he will replace all the planks below the water line. In the end, he will have replaced everything below the waterline except the deadwood and the ballast. The old boat is just a mold for the new boat he is building. Seems like Electra was not in very good shape when he bought her. You can follow the progress in the pictures below.
Allen
The Rebirth of an L-36
Electra is being rebuilt to better than new condition while retaining
the timeless elegance of her design. All mahogany brightwork and
bronze fittings will be retained. Improvements will allow for safety
and reliability but not at the expense of compromising Lapworth's
graceful style of the L-36. CAD drawings have been made of all
replacement parts and eventually engineering drawings will be created
for the hull, deck, mast and interior.
To date, approximately half of the keel bolts, floors, and ribs have
been replaced. Replacement bolts are custom CNC machined silicon
bronze, floors are solid white oak, and ribs are laminated white oak.
A replacement Westerbeke 30B diesel has been torn down and is being
rebuilt parallel with efforts to rebuild the hull.
Sections of the hull will need to be replanked, faired and
refinished. The cockpit will be rebuilt very similar to the original
design with improvements to the weather sealing of the lift-up seat
hatches. Standing and running rigging will be replaced as well as all
electrical systems wiring. New Spartan Marine seacocks will be
installed. 1950's style brass Foresti & Suardi navigation lights will
be used. Most of the replacement hardware has been purchased and
inventoried for future installatonto insure a timely restoration
schedule. Eventually, a revised interior will include updates in
design and function for both day sailing and racing. Electra should
be splashed later this year and will make the coastal waters of
Southern California her home.
Click on thumbnail to see larger image
|
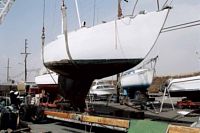
Loading onto the trailer
|
|
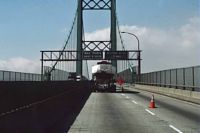
Traveling over the Vincent Thomas bridge in San Pedro, CA to the Moger
Yacht Storage yard.
|
|
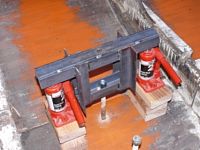
Jig used for pulling keel bolts. These are .500 inch steel bolts which
went through the dead wood.
|
|
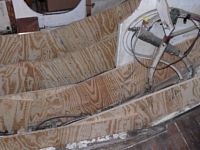
Plywood used to reenforce broken ribs in the main cabin prior to
hauling and transport.
|
|
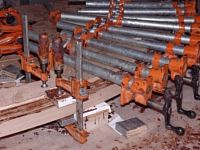
Set-up for fabricating new ribs. New laminated ribs are 13 layers of
.125 by 1.38 inch white oak glued with Resorcinol glue. Small clamps
on left are used for vertical alignment prior to clamping with large
clamps approximately 3 inches on center.
|
|
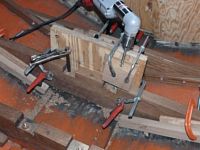
Original keel and deadwood bolts were skewed to follow the taper of the
keel and then bent perpendicular at the keelson to allow for straight
through holes in the floors. Rather than weaken the new bolts by
bending, skewed holes were drilled in the floors using this jig. Floor
and ribs are initially clamped to a backing plate to establish position
of the floor, then the floor is removed and a drill guide block and
alignment rod used to establish alignment of the thru hole on the first
side, alignment rod is then removed, floor repositioned, and drilled
through. Process is repeated for the other side. Shown here is the
drilling of the second hole where the alignment rod is used to position
the floor relative to the first hole.
|
|
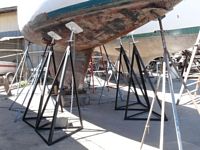
Extra jack stands are placed at critical locations along the hull as
frames are removed and replaced.
|
|
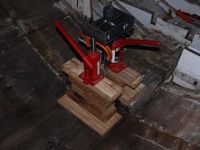
The floor at location 14 was completely rotted and the keelbolt severed
several inches below the top nut and washer due leakage from the icebox
drain fitting. Only 2.5 inches of keelbolt was exposed above the
keelson making removal a difficult task. A new approach was devised
where a 5/32 inch hole was drilled through the keelbolt and a piece of
5/32 hitch pin (just below the C-clamp) was inserted through the
lifting tangs and the keelbolt. C-clamp was used to keep the tangs
from spreading apart. The worked very well and little deformation of
the hitch pin was noted.
|
|
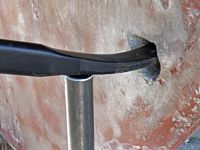
Additional upward thrust was required to remove the keelbolt at
location 14. Here a 36 inch crowbar supported by a .75 inch ID water
pipe fulcrum is used to apply upward pressure in tandem with the
pulling tool inside the hull.
|
|
Removal of keelbolt at location 14 in progress
|
|
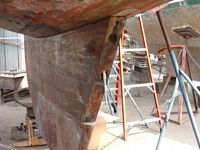
Given the comprise of keelbolts at location 13 and 14, the deadwood had
separated from the underside of the keel stem by .10 - 15 inch. Here a
1/2-13 threaded rod is used to bring the deadwood and stem together.
Upper end of the rod has a plywood backer plate resting on the keelson,
lower end an oversized washer and coupling nut. Bottom end of rod is
counter-held using vise-grips while the coupling nut is tighten.
|
|
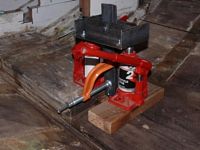
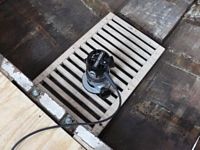
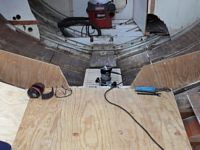
Top portion of the keelson was partially rotted due to fresh water leakage from the icebox. This jig was used to remove the top .38 inch of the keelson to allow a dutchman to be glued in place. Jig sits on two 1 inch dowels (not visible, but resting on the garboard) and moved fore and aft to help remove defective wood. This set-up worked quite well and only minimal block sanding by hand was required to finish the job. Shop vacuum was used to remove saw dust as worked progressed.
|
|
Temporary cabin sole of plywood and reinforcement of remaining frames. Work with the router was done while lying on my stomach on the cabin sole. The provided excellent control of the router using both arms. A clean work place really improves work efficiency.
|
NOTICE: Some pages have affiliate links to Amazon. As an Amazon Associate, I earn from qualifying purchases.
Please read website Cookie, Privacy, and Disclamers by clicking
HERE.
To contact me click
HERE. For my YouTube page click
HERE


