Line and Rigging
Inhauler
8:1 Detachable Dual Acting
By Allen Edwards
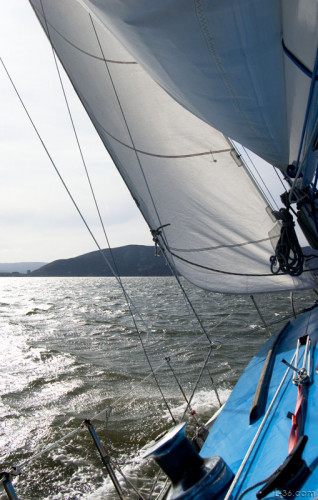
An inhauler, sometimes called a Barberhauler, is used to pull the jib sheets inboard from their normal position. You can do that to decrease the sheeting angle or to keep the sheeting angle the same as you let the sheets out to add fullness. We do that when we need more power to drive through the waves. In flat water, we don't use it and the rings just sit on the sheets without load. I actually have twings setup on these sheets and the rings is used by the twings as well. The rings I use are very light so they do not harm the paint on the deck. They are descending ring are from REI and their 5,000 pound rating, typical of climbing equipment, is ideal for my boat. Low friction yacht rings work as well but are more expensive. At one time I used carabiners with wire gates. They will grab stuff. If you are going to use carabiners, use locking ones. Some of the pictures below are older and show carabiners.
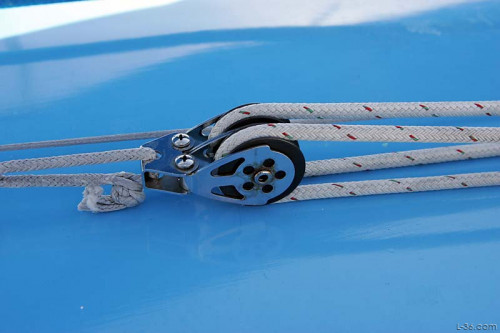
This is generation 3 of my inhauler setup. It is easier to use than previous setups because there is a single control point. The 8:1 purchase seems ideal for the job and the fact that one control line works both port and starboard is a great advantage. Once balanced, you are automatically maintain your trim after a tack. I like to rig my double block so the line is against the deck instead of the face. You can see that in the pictures below.
I should note that a jib needs to be cut for an inhauler. Ideally, the clew should be at cabin top height. A higher clew will work but with reduced efficiency.
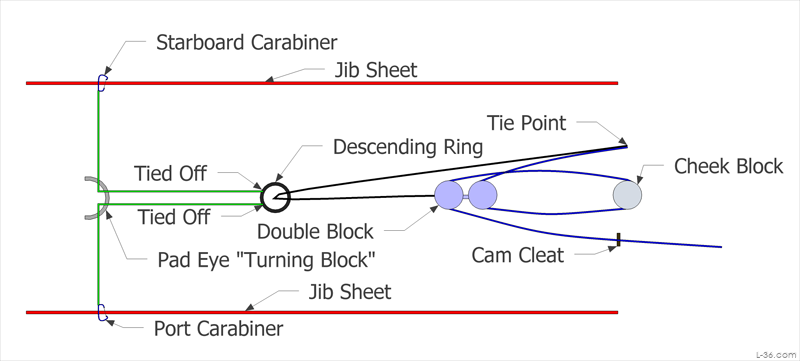
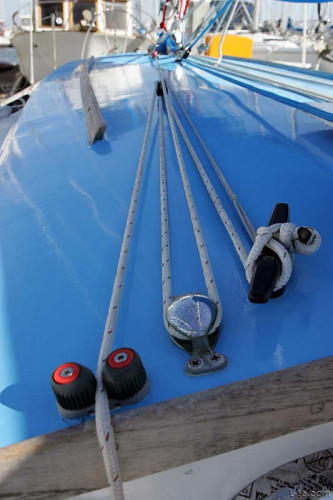
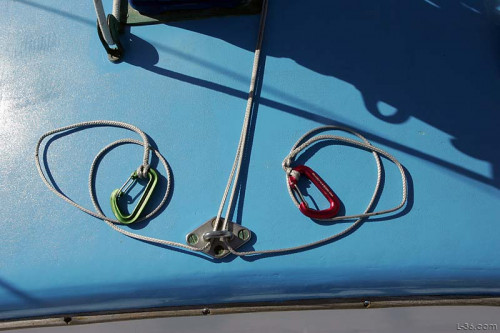
This picture shows the control end, the tie point (cleat), the cheek block, and the cam cleat.
There are two ways the block can be strung. One way will naturally cause the face of the clock to rub against the cabin top. This way will naturally cause the lines to rub against the cabin top. This block is 4:1
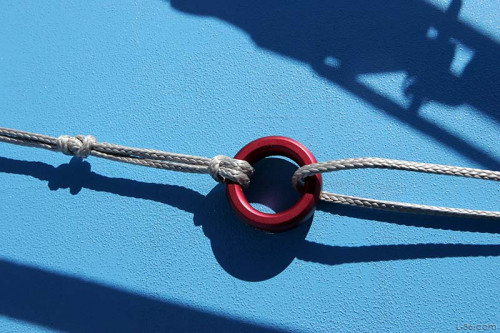
The ring forms the 2:1 part of the cascaded 8:1 total purchase. With the defender ring and the slick amsteel, there is very little loss to friction. The line between the two carabiners is a single piece of Amsteel with eye splices. The loop you see here is a stopper knot and a luggage tag knot. This allows for some adjustment so that the port and starboard settings are the same.
I used a simple pad eye for the turning block. Again, the use of slick amsteel reduced the friction. The block should be placed just forward of athwartship of the aft end of the jib sheet knot so that you get maximum leverage. In my case, that should be about 10 inches forward of the mast for my 90% jib and 13.5J. If the inhauler is pulling forward at 30 degrees, your 8:1 purchase becomes 7:1. If the turning block is too far aft, assuming the sheet is still at cabin top height back there, the loss will be higher something like 5:1 if the turning is 6 inches aft of the clew. Basically, you want the inhauler to pull in level to the deck, perpendicular to the boat centerline, and near the clew. That said, the padeye turning block also needs to be far enough forward or off to the side so that the line going back to the ring will clear the mast.
This is a sketch of the inhauler connected to my 90% cabintop cut jib.
For reference, here is one of the old versions that shows using an inhauler to run this jib inside all the rigging except the forward lower. This greatly improved the pointing of this sail. I ultimately opted for a new sail and an inside track as shown in the sketch above.
NOTICE: Some pages have affiliate links to Amazon. As an Amazon Associate, I earn from qualifying purchases.
Please read website Cookie, Privacy, and Disclamers by clicking
HERE.
To contact me click
HERE. For my YouTube page click
HERE