Soft Shackles
Integral Halyard Soft Shackle
By Allen Edwards
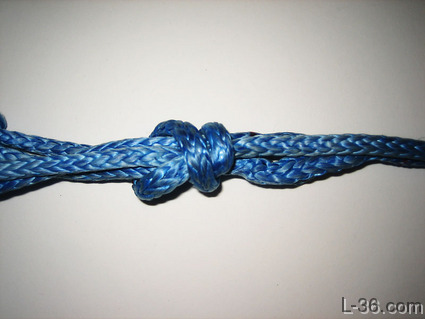
 This soft shackle in integral to the halyard. It is made from a single line with a combination of knots with a finishing splice. I have tested it to over 1000 pounds using 3/16 Amsteel without slip. While I have not tested it to destruction it is very likely that the shackle is stronger than the line so that the failure would be outside of the shackle area. I base that on the fact that the shackle area is made of either 2 or 4 lines so any loss due to the knots is unlikely to bring the strength below line strength. Of course, a halyard is typically not loaded that high as the application is mainly stretch limited. That said, be sure to do your own testing before using this in any critical application.
I should point out that there I have an article on a much more straight forward halyard shackle system. It uses two parts, one on the sail head with a openable eye on the halyard. Much simpler. CLICK HERE. On Papoose, I use a standard loop and a pin as shown HERE in a mock up of the sail head. But the challenge of making a single integrated shackle-halyard combination led me to come up with this method. I hope you enjoy it.
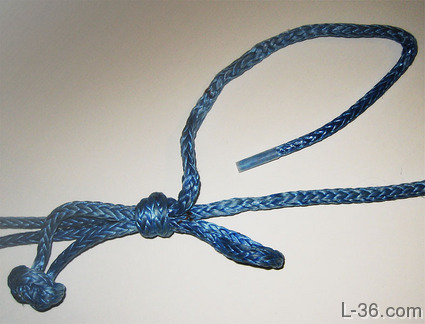
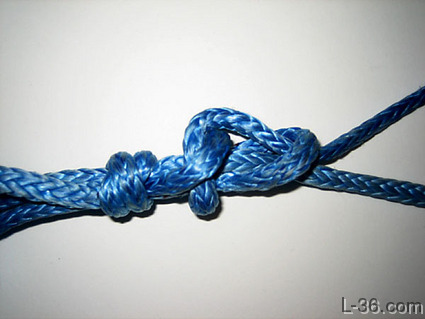
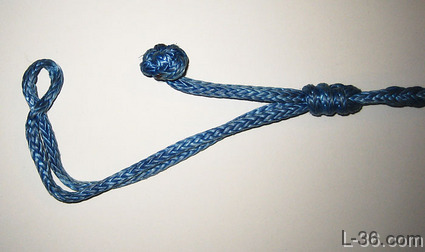 This is a picture of the shackle in the open position. The shackle is made up of the stopper knot and the eye formed by passing the Amsteel through itself. This is similar to the Kohlhoff style soft shackle which I find much easier to use and just as strong. All this is held together by the two knots in the halyard above the shackle portion. The lower knot is half of a double fisherman's knot. It is tied in the halyard so it is pulled up by the halyard working end. Above that is a locked loop that is similar to a bowline. That holds the soft shackle up by pulling down on the fisherman knot. My testing showed that this knot does not slip and as the double fisherman's know is well regarded for use on Amsteel, that is not surprising.
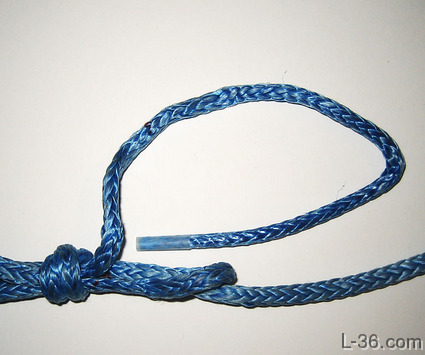
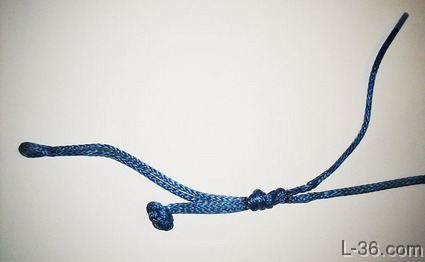
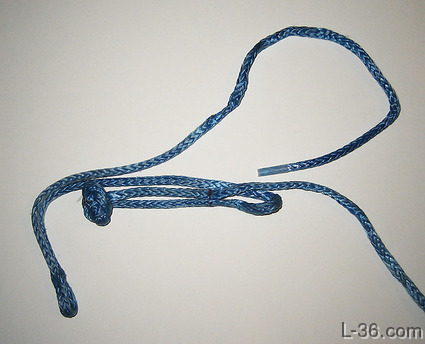 The basic layout just before tying the knows is shown here. This is your goal for the first part of making this shackle. The halyard working end goes off the page in most of these pictures and in this case it comes in from the right. It goes to the stopper knot. The other line out of the stopper knot goes back parallel to the halyard working end then loops back down to the eye. After the eye, the line goes back past the area where the knot will be and will eventually be buried into the halyard above the knot. Using the center of the stopper knot as a reference, I used 19.5 inches of line for a 6 inch shackle and 17 inches for the knot and tail. Total that you get 36.5 inches from the center of the stopper knot to the end of the line so measure that off and make a mark.
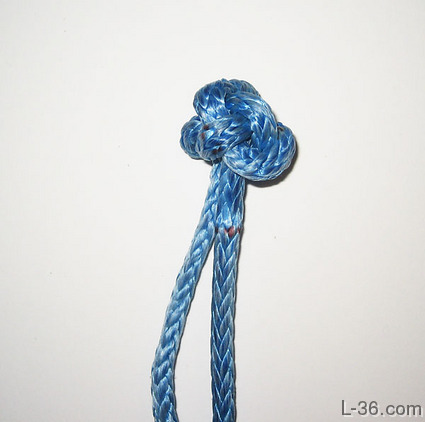 Tie a Chinese Button knot in the line as shown. Instructions are HERE.
 Next thread the end through the line to form the eye. The position of the eye will determine the size of the shackle.
We can now form the lines into the goal position I showed above.
Next thread the end through the line to form the eye. The position of the eye will determine the size of the shackle.
We can now form the lines into the goal position I showed above.
 Warp the halyard working end around the rest of the lines two times.
 And thread it under the two loops to form the fisherman's knot.
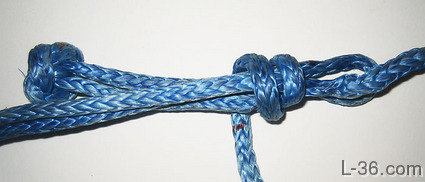
 Pull it tight to get the picture at left.
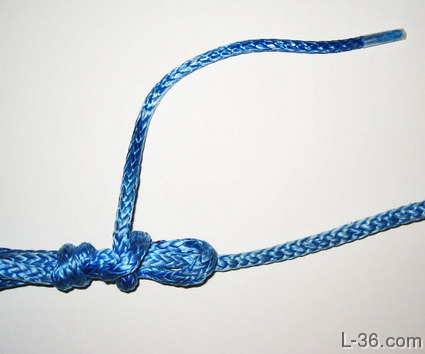
 Tuck the halyard through the loop as shown.
 Knot the end around the other lines as shown.
 And pass the end thought the loop.
 Pull everything tight. Make sure all the lines are the right length specifically that the eye has the correct size opening, about a line diameter. It may open a little when the halyard it tightened. You will want to pull hard to lock the knots.
Bury the end in the main halyard and lock stitch it and you are done.
Pull everything tight. Make sure all the lines are the right length specifically that the eye has the correct size opening, about a line diameter. It may open a little when the halyard it tightened. You will want to pull hard to lock the knots.
Bury the end in the main halyard and lock stitch it and you are done.
NOTICE: Some pages have affiliate links to Amazon. As an Amazon Associate, I earn from qualifying purchases. Please read website Cookie, Privacy, and Disclamers by clicking HERE. To contact me click HERE. For my YouTube page click HERE